20190710 - This post has been updated for Python 3, tensorflow 2 and coremltools3
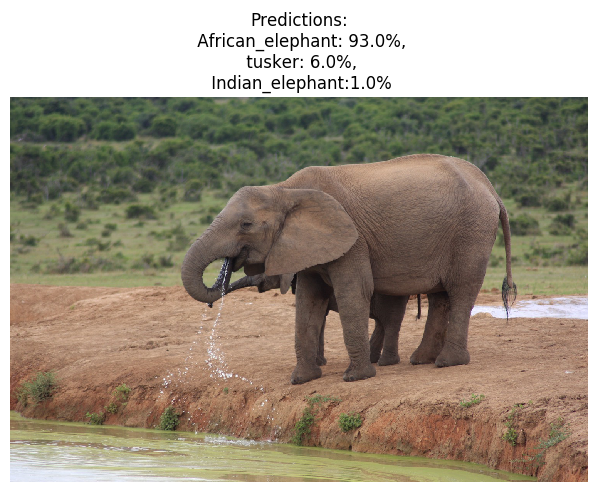 Figure showing a prediction of the content of the image using ResNet50 trained on imagenet. Photo taken at Addo Elephant National Park, South Africa by Iulia Popescu. Pretty good predictions although I’m not really sure what “tusker” is.
Machine learning is quickly becoming a standard tool to enhance software, for example in:
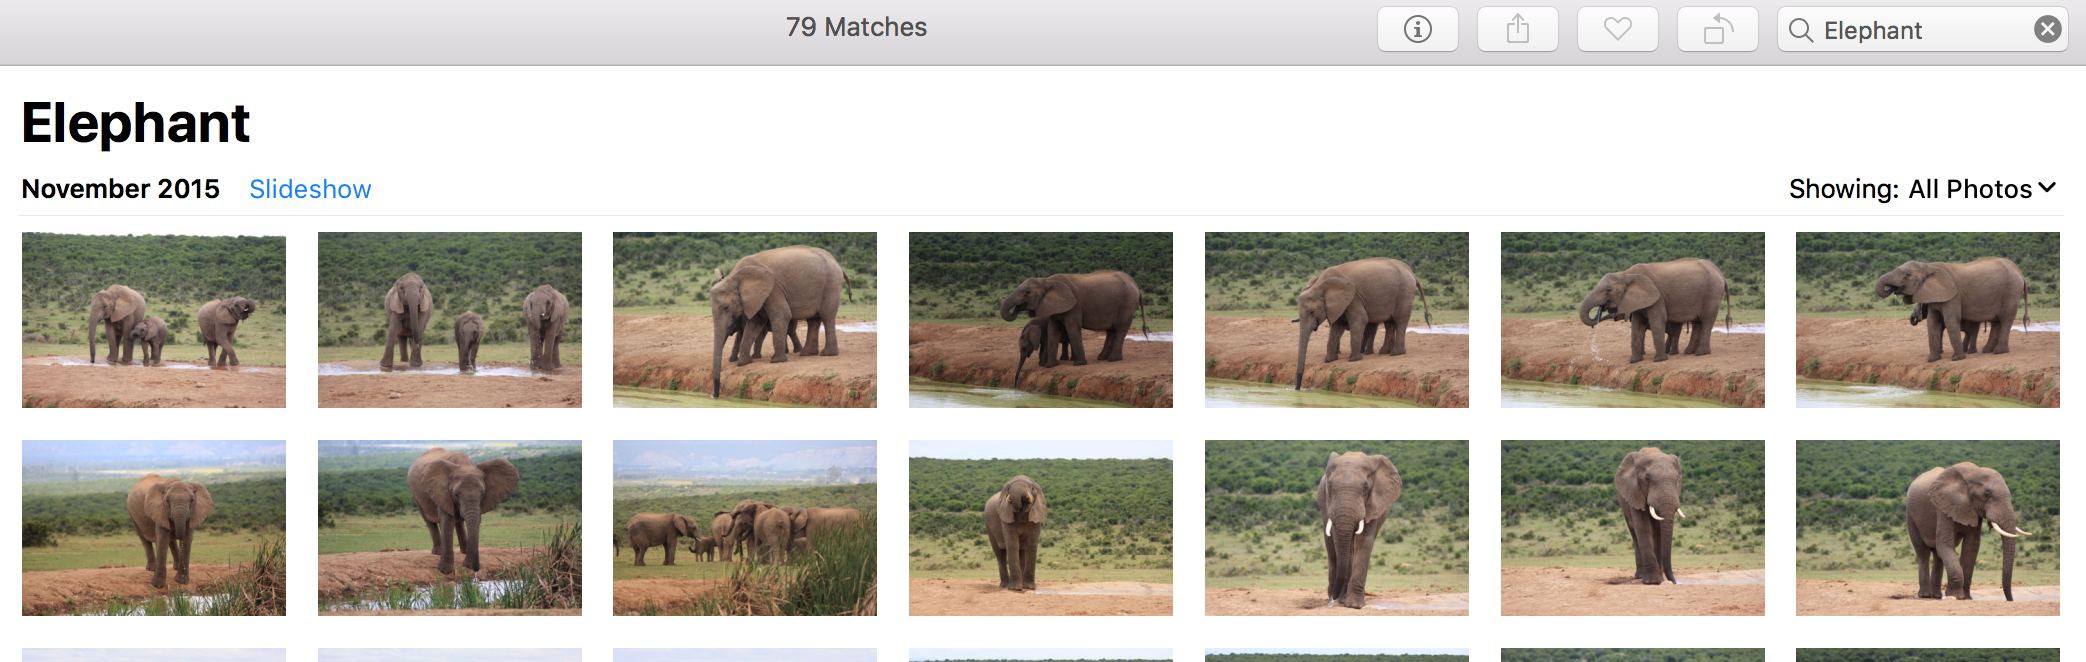
- photo applications (e.g. the image below shows the photo search functionality in macOS Photos)
- analytics
- ground breaking improvements in areas such as language translation.
Machine learning models are being run on all devices from high end GPUs to mobile phones, and major libraries like Tensorflow offer cross platform and mobile support making it relatively easy to run the same model on multiple platforms. What’s really interesting is that we’re seeing the rise of tools to convert models between libraries and formats. This means that it’s getting even easier to train a model once, and use the model, wherever required, without worrying about compatibility or bundling dependencies.
One example is apple’s mlmodel format, which is used in the CoreML library. Interestingly, coreML doesn’t have the ability to train new models but instead they provide the coremltools python package that allows model conversion and saving from major machine learning packages. This means that models can be created and trained using your favourite machine learning library such as Keras, and run across all macOS and iOS devices without requiring any additional libraries.
A pretrained model to classify images was loaded in Keras / tensorflow, converted to the mlmodel format and then used in macOS with swift and coreML to create a command line app to classify images. Below is a short tutorial / demo.
Creating a simple command line application to classify images based on content using built in libraries
The final app reads an image and prints out likely content and the confidence in that label. The model is a pretrained ResNet50 and model labels rely on the training set meaning that some labels are very specific e.g. “tiger cat”, “espresso”.

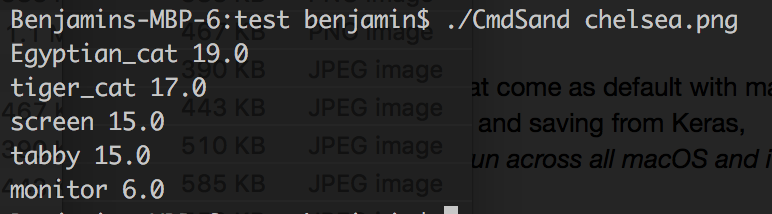


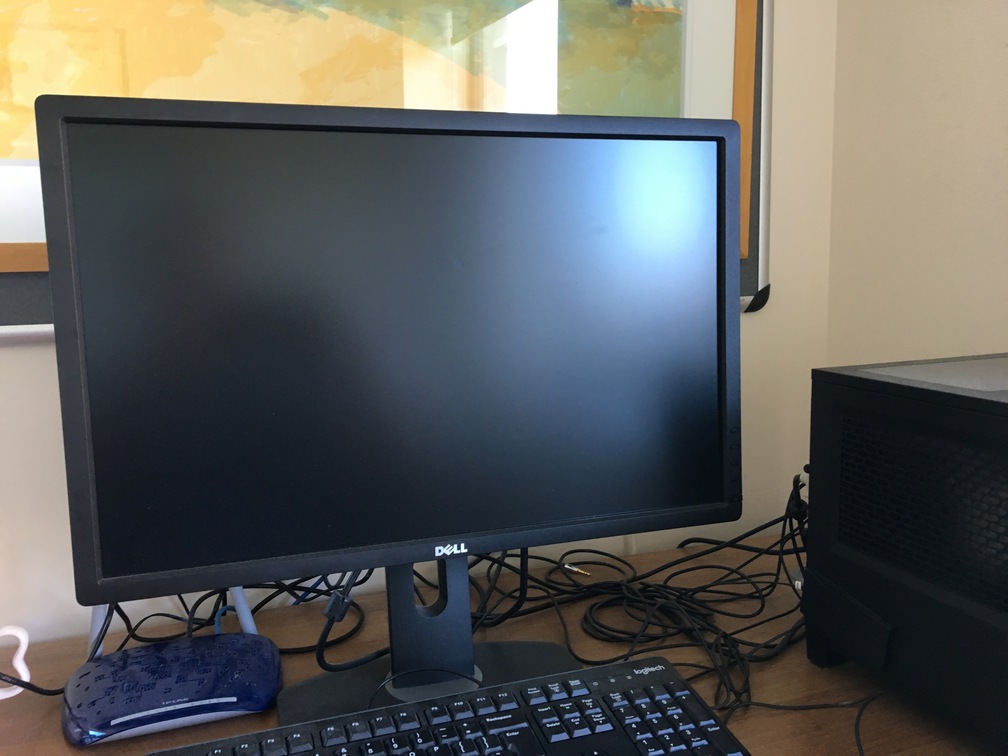
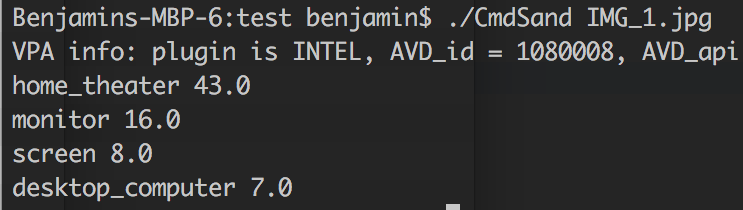
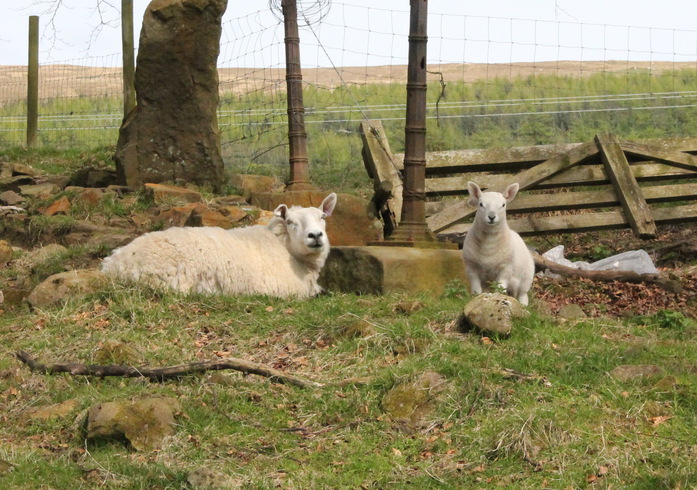
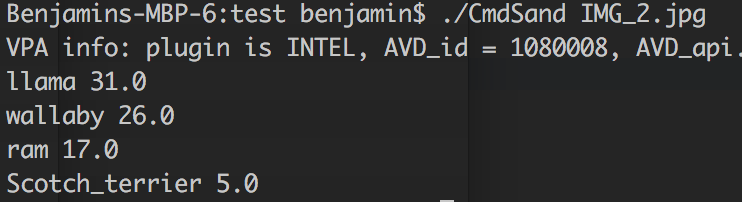
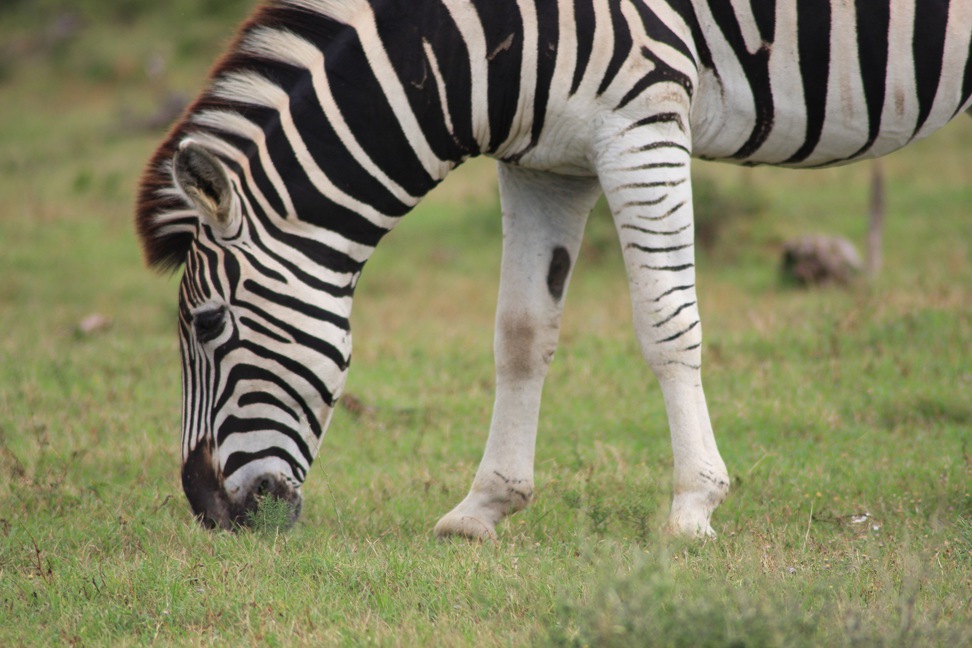

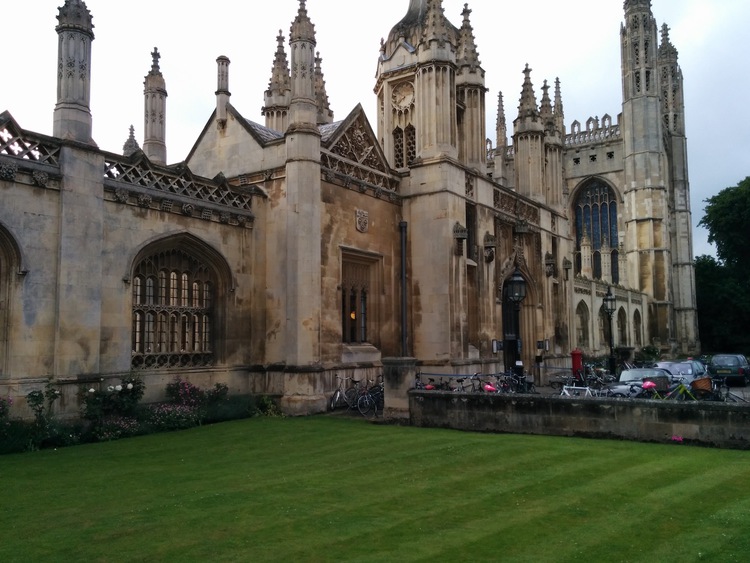
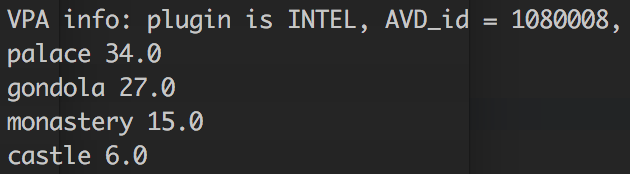

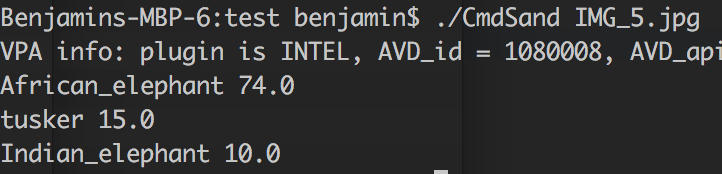
Photo credits: 1) Chelsea Cat - No copyright restrictions. CC0 by the photographer (Stefan van der Walt) 2) Coffee - No copyright restrictions. CC0 by the photographer (Rachel Michetti) 3) Clock - Benjamin Irving 4) Computer - Benjamin Irving 4) Sheep - Benjamin Irving 5) Zebra - Iulia Popescu 6) - Cambridge - Benjamin Irving 7) Elephant - Iulia Popescu
Step1: Building an ML model in Keras
The Python code to load the pretrained model is shown below and has the following steps:
- Load a pretrained Keras Resnet model (Given a good dataset, training a model is straightforward in Keras but in this demo it’s straightforward to use the pretrained ResNet50)
- Test the pretrained model on a single loaded input and plot image and results
Full code available on github at: https://github.com/benjaminirving/coreml-simple-demo
from keras.applications.resnet50 import ResNet50
from keras.preprocessing import image
from keras.applications.resnet50 import preprocess_input, decode_predictions

import numpy as np
from scipy.ndimage import imread
import matplotlib.pyplot as plt

# Load a model.
model = ResNet50(weights='imagenet')

# Example image to classify
img_path = 'img/IMG_9286.jpg'
img = image.load_img(img_path, target_size=(224, 224))
x = image.img_to_array(img)
x = np.expand_dims(x, axis=0)
x = preprocess_input(x)

preds = model.predict(x)
pred_name = decode_predictions(preds, top=3)[0]

print('Predicted:', pred_name)

x1 = imread(img_path)
plt.imshow(np.squeeze(x1))
plt.title('Predictions:\n {}: {}%,\n {}: {}%,\n {}:{}%'.format(
    pred_name[0][1], np.around(pred_name[0][2]*100),
    pred_name[1][1], np.around(pred_name[1][2]*100),
    pred_name[2][1], np.around(pred_name[2][2]*100)))
plt.axis('off')
plt.show()
Step 2: Conversion to the mlmodel model format using coremltools
The next step saves the mlmodel.
- Use Apple’s coremltools to convert the keras model to the mlmodel format
- Note:
- Class names need to be specified
import coremltools

# Convert to mlmodel
coreml_model = coremltools.converters.keras.convert(model,
                                                    input_names='data',
                                                    image_input_names='data',
                                                    class_labels=class_labels)
# Now save the model
coreml_model.save('ResNet50.mlmodel')
Step 3: Creating a swift command line tool
Finally, a macOS command tool is created in swift with the following steps:
- Use macOS Vision and CoreML libraries to run the model
- Create a handler function to process the model outputs
- Access the label name and confidence in that label
- Print to the command line
- Access the command line argument that contains the image path
- Load the image as a CIImage
- Access the saved mlmodel
- Note: the mlmodel needs to be added to the swift project so that it can be compiled to swift code
- Pass the image into the model and process the results
import Vision
import CoreML

// Handler for model
func output_handler(request: VNRequest, error: Error?) {
    guard let results = request.results as? [VNClassificationObservation]
        else { fatalError("Unable to process") }
    print("That looks like a:")
    for class1 in results {
        if (class1.confidence > 0.05) {
            // Only show greater than 5%
            print(class1.identifier,
                round(class1.confidence*100))
        }
    }
}

// arg[1] should be in path
let a = CommandLine.arguments
let size = a.count// Otherwise throw an error
if (size != 2) {
    print("Incorrect number of arguments")
    exit(0)
}

// Load image from file
let inputURL = URL(fileURLWithPath: a[1])
let inputImage = CIImage(contentsOf: inputURL)

// Easier way to do it but not supported in keras
guard let model = try? VNCoreMLModel(for: ResNet50().model) else {
    fatalError("can't load ML model")
}

// Process image
let request = VNCoreMLRequest(model: model, completionHandler: output_handler)
let handler = VNImageRequestHandler(ciImage: inputImage!)
try handler.perform([request])
Full code available on github at: https://github.com/benjaminirving/coreml-simple-demo
Step 4: Running
Find the built binary in the finder and run on an image.
See: https://github.com/benjaminirving/coreml-simple-demo
As a last thought, I’ve just discussed creating a simple command line app. But once the model is in mlmodel format these models can easily be integrated into iOS apps as well,